Monday, October 21, 2013

Birthday Blog Hop Day Two ~ Karen's Creations


Today's featured blogger is my spookalicious friend, Karen from Karen's Creations.

Hi, I'm Karen from Karen's Creations. I love  creating with paper and have an obsession with making mini albums and journals.     My first thought was to make an album as this is what I love doing, and am sure everyone expected me to make.  So I did the unexpected and created a gift tag instead.
I used a re-purposed vintage layaway tag for my base, and MME's Wicked  paper.  I embellished it with a little touch of burlap, canvas border, a felt spider,  a handcrafted stick pin, vintage black seam binding ribbon, and a unique hand crafted skull button. Can you tell what I made the button out of? 

I am all about the vintage look, and I hope that I captured it in this tag.

Materials I used:
My Mind's Eye Papers
Tim Holtz Black Soot Distressing Ink
Pink Paislee Hocus Pocus Canvas border and skull
Felt Spider
Burlap
Vintage layaway tag
Vintage Poker Chip

Below is the line up for you so you are sure not to miss a single chance to be inspired and to win something amazing!
Be sure to stop by each blog...I promise you won't be disappointed!
*****
Thank you Karen for joining the party and sharing your spooky skull and crossbones creation!
*****
♥♥♥And now for Today's Giveaway Goodies♥♥♥
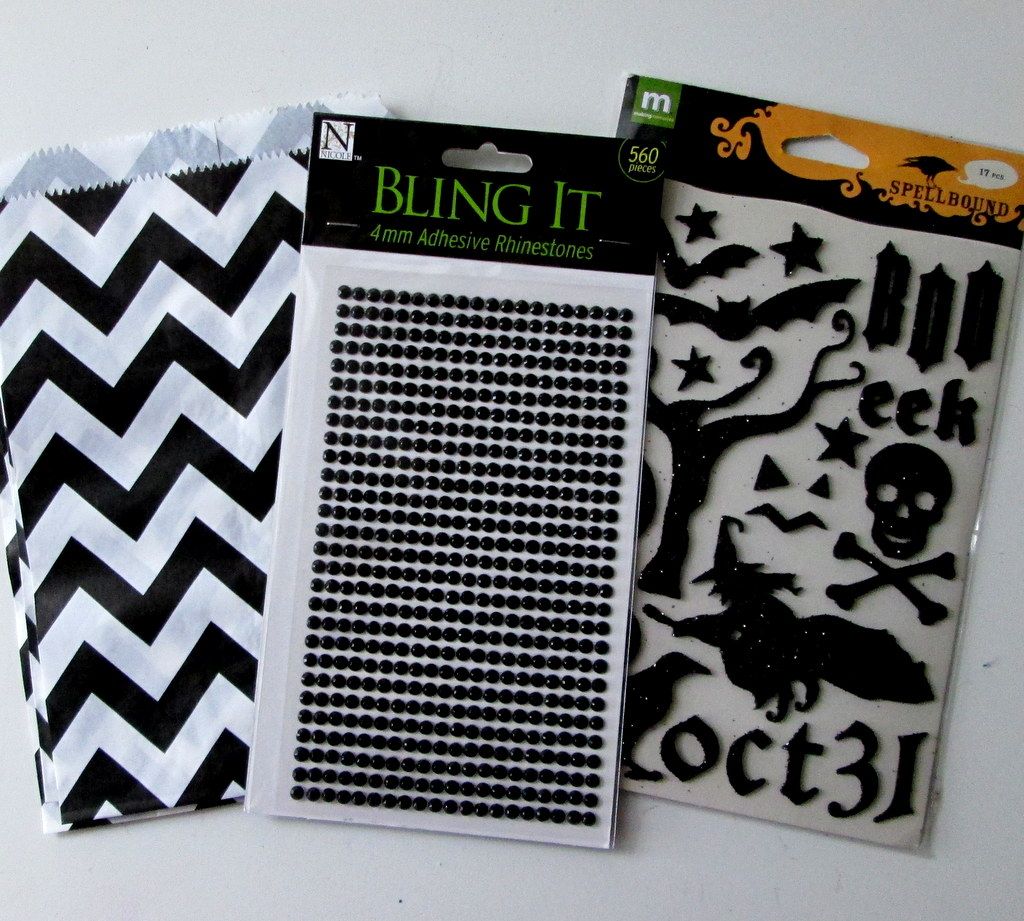
Creepy Craft it Up Kit includes 6 Chevron party bags, Bling it Adhesive Rhinestones and Making Memories Spellbound Glitter Stickers.
**Giveaways Open to US residents only.**

a Rafflecopter giveaway

Sunday, October 20, 2013

Cute (&) Spooky Birthday Blog Hop Day One ~ Created By Donna K

Today's featured blogger is my wickedly talented friend, Donna K from Created by Donna K.
Happy Birthday Polka Dotted Bliss!
Here is a little "ONE-sie" I created in honor of the big 1 year anniversary celebration.
I thought a polka dotted card was appropriate. I like scary Halloween when it comes to the big kids, but not for the littles.
*****
I hope that you enjoy the celebration and I want to thank Kimberly for making me part of the party. I'm tickled to be among such talented artists.
Thanks for coming by today!
~Donna K
*****
Supply List:
Papers: StampinUP
Stamp: Studio G
Ink: StampinUP
Die: PaperTrey Ink
Ribbon & Eyes: StampinUP
*****
Thank you Ms. Donna K for joining the party!
Below is the line up for you so you are sure not to miss a single chance to be inspired and to win something amazing!
Be sure to stop by each blog..I promise you won't be disappointed!
*****
♥♥♥And now for Today's Giveaway Goodies♥♥♥
1 Set of 3 x 3 inch mini-notecards with envelopes, perfect for lunchbox notes, teacher gift or Halloween "Boo" gift!
**Giveaways Open to US residents only.**

ENTER THE RAFFLECOPTER GIVEAWAY BELOW

a Rafflecopter giveaway

Friday, October 18, 2013

Woot Woot ~ Look Who's Coming to my Party!!

I am so tickled pink about the line up for next week's Birthday Bash that I just had to share who's helping me celebrate.  You've probably seen most of them featured on my blog or FB page, these are some of the most talented paper artists I know!  They inspire me to be better at my craft and in life and next week you will see why!  Here's the line up:


Be sure to come back starting Sunday, October 20th and see what they created for the Polka Dotted Bliss One-year Birthday.  Want to join in the pre-party fun?  Join the Facebook event here.

Thanks for stopping by!


{{Hugs}}
Kimberly

Tuesday, October 15, 2013

Polka Dotted Bliss is Turning One!


Hey Polka Dotted Bliss Fans!  Hard to believe that I launched the new shop name a year ago already.  As a thank you for all your support through Etsy, my blog, Facebook and Pinterest, I'm having a week-long birthday bash to celebrate.  AND, I invited some of my best scrappy friends along to share some Halloween inspiration with you.  AND, let's not forget the prizes...a giveaway a day...all next week.  So get yourself over here starting Sunday, October 20th to join in the fun!  If you want to join the pre-party fun on Facebook and see sneak peeks of the prizes, come on to the event here.  Be sure to tell your scrappy friends too!

Thanks for stopping by!

{{Hugs}}
Kimberly

Monday, October 14, 2013

Too Cute to Spook "Boo" Banner


I am posting today as a guest designer for Craft It Up & Link It Up Linky Party hosted by Tara of Craftin Desert Divas! Every other Monday will mark the beginning of a new semi-weekly linky party and you could win fabulous prizes!!

This linky party theme is Halloween. The sponsors are Too Cute by Jessica - $20 giftcard and
Stinkin Cute Paper Piecings - $25 giftcard. The more you link up, the better chance you have to win.  Visit Craftin Desert Divas for all the rules and to play along.


Here is what I created for this linky party....

You know I had to use my signature polka dots somewhere! 

 I got the Purple Glittery Thickers from T.J.Maxx for $1.49, yes, I love my bargains!

 Think I found the cutest witch around :)


Supplies I used for this project are:
"Witch Hazel" 8 x 8 paper pad (October Afternoon)
Scalloped Edge chipboard album (Michaels)
Spider Web 12 x 12 paper (Michaels)
Striped grosgrain ribbon (May Arts)
Courtney Glitter Foam Thickers (American Crafts)
Polka Dot 12 x 12 paper (JoAnn)

This project is also linked up to:

Thanks for stopping by!
{{Hugs}}
Kimberly


Monday, September 30, 2013

Cupcake Liner Flower DIY

Have you seen those cute little cupcake liner rosettes floating around?  Well, I've been wanting to try them for awhile now (actually bought the liners last year) and I thought they'd be just right for a cute Halloween banner.  Yeah, we don't really do too much creepy over here!

All you need to make yours are cupcake liners (available at any craft store), 
quick drying glue and pinking shears.  

1.  First, fold each liner in half and trim with decorative scissors or shears.  I used smaller liners on top, but you could always trim down another large liner.
2.  Next, unfold the liner and scrunch up the middle (the more you scrunch it, the more pleats you will have).  Now, flatten the center.
3.  Then, add glue to the center and begin layering the liners.  I used two polka dot, one white and black patterned, and then an orange spider web liner.
4.  For the center, I punched a scalloped circle out of patterned cardstock, glittered the edges and used Thickers for the lettering.

Here is a closeup, aren't they fun?  I will definitely be making more!

Have you used any household items in your crafting?


Thanks for stopping by!
{{Hugs}}
Kimberly

Monday, September 16, 2013

Magic Number 5!

We had a great weekend, topped off by relaxing with good friends at their son's 5th birthday party yesterday!  I wanted to share the card I made for the birthday boy.

I have a lot of scraps to use up, and found the perfect colors for this card.  The cardstock is Bazzill, the paper is Nana's Kids by DCWV and the stickers are Bo Bunny (discontinued).


The fun little tickets are leftover from my son's carnival party.

One thing I enjoy about handmade cards is being able to personalize them...for this I used a white Souffle marker.  I love this especially for kids, they absolutely light up when they see their name on something :) 

Thanks for stopping by!

{{Hugs}}
Kimberly